
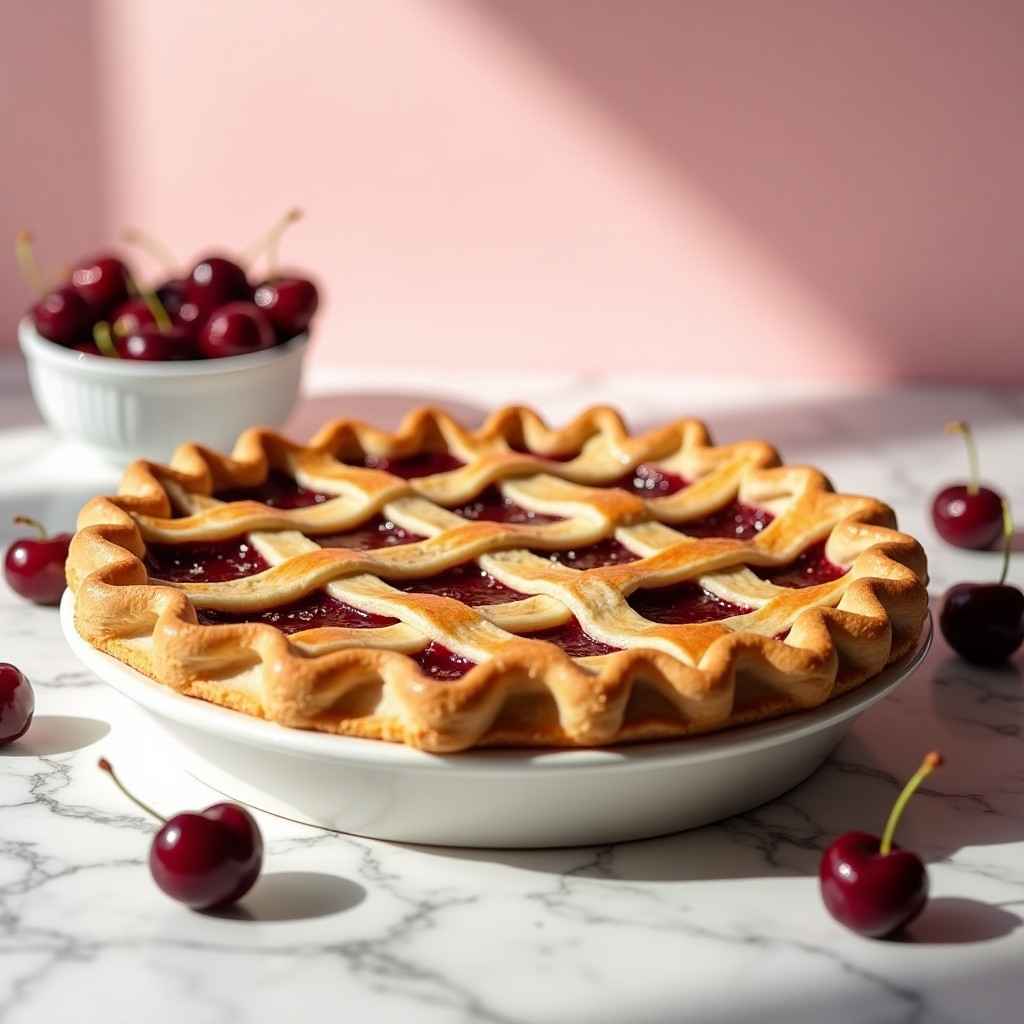
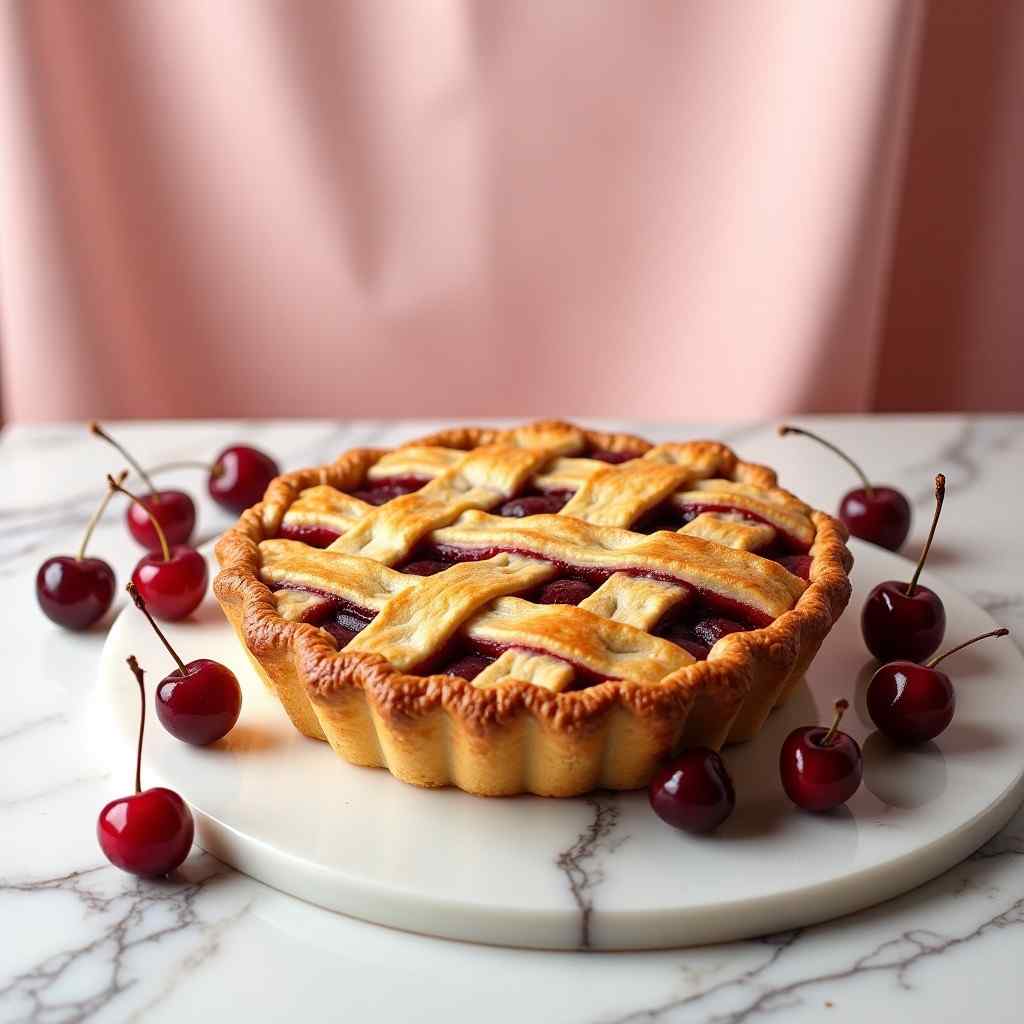
Cherry pie with a double crust is the ultimate classic dessert that embodies the taste of homemade goodness. The vibrant, tart-sweet cherry filling paired with a golden, flaky double crust creates a pie that’s both comforting and elegant. This recipe is perfect for holidays, family gatherings, or whenever you crave a slice of nostalgia.
What I love about this cherry pie is the balance of sweet and tart cherries enveloped in buttery, flaky pastry—it’s irresistible. The aroma while baking fills your kitchen with warmth, instantly lifting your mood. This is a must-try dish for anyone who appreciates traditional desserts with a timeless appeal.
Why You’ll Love This Recipe
- Perfectly flaky double crust that melts in your mouth.
- Sweet and tangy cherry filling with natural juiciness.
- Balanced sweetness, not overly sugary, letting the cherries shine.
- A visually stunning pie with golden lattice or fully covered crust.
Why It’s a Must-Try Dish
Cherry pie is iconic in dessert culture, and this recipe ensures the perfect texture and flavor every time. Its combination of tart cherries and buttery crust is unforgettable, making it a crowd-pleaser for all ages. Whether for a festive occasion or a cozy weekend treat, this pie never disappoints.
Recipe Details
- Preparation Time: 30 minutes
- Cooking Time: 50–60 minutes
- Total Time: 1 hour 20–30 minutes
- Servings: 8
- Calories: Approximately 350 kcal per serving
- Course: Dessert
- Cuisine: American
Ingredients
For the Pie Crust (Double Crust)
- 2 ½ cups all-purpose flour
- 1 tsp salt
- 1 tsp sugar
- 1 cup unsalted butter, cold and cubed
- 6–8 tbsp ice water
For the Cherry Filling
- 5 cups fresh or frozen pitted cherries
- 1 ¼ cups granulated sugar (adjust to taste)
- 3 tbsp cornstarch
- 1 tsp lemon juice
- ½ tsp almond extract (optional, enhances cherry flavor)
- Pinch of salt
For Assembling
- 1 egg, beaten (for egg wash)
- 1 tbsp coarse sugar (optional, for sprinkling)
Special Equipment Needed
- 9-inch pie dish
- Rolling pin
- Mixing bowls
- Pastry cutter or food processor (for crust)
- Pastry brush
- Lattice cutter (optional)
Cooking Directions
- Prepare the Pie Crust:
- In a large bowl, mix flour, salt, and sugar.
- Cut in cold butter using a pastry cutter or food processor until the mixture resembles coarse crumbs.
- Gradually add ice water, 1 tbsp at a time, until dough comes together.
- Divide dough into two discs, wrap in plastic, and refrigerate for at least 30 minutes.
- Prepare the Cherry Filling:
- In a large saucepan, combine cherries, sugar, cornstarch, lemon juice, almond extract, and salt.
- Cook over medium heat until mixture thickens slightly, about 5–7 minutes. Remove from heat and let cool.
- Assemble the Pie:
- Preheat oven to 425°F (220°C).
- Roll out one dough disc and fit into the 9-inch pie dish.
- Pour in the cherry filling.
- Roll out the second dough disc and cover the pie. You can either make a solid top with slits for steam or create a lattice crust.
- Trim excess dough and crimp edges.
- Brush top with beaten egg and sprinkle coarse sugar if desired.
- Bake the Pie:
- Bake at 425°F (220°C) for 15 minutes.
- Reduce oven temperature to 375°F (190°C) and bake an additional 35–45 minutes until crust is golden and filling bubbles.
- If the edges brown too quickly, cover them with foil.
- Cool and Serve:
- Allow the pie to cool for at least 2 hours before slicing to let the filling set.
Step-by-Step Preparation Method
- Make the pie crust and chill it.
- Cook the cherry filling until thickened.
- Roll out the bottom crust and line your pie dish.
- Pour the cooled cherry filling into the crust.
- Roll out the top crust and cover the pie, creating either a solid or lattice top.
- Trim and crimp the edges, then brush with egg wash.
- Bake first at high temperature, then reduce for even browning.
- Let pie cool completely before slicing.
How to Serve
- Serve warm or at room temperature.
- Pair with vanilla ice cream, whipped cream, or a drizzle of chocolate sauce for extra indulgence.
Recipe Tips
- Use tart cherries for the best flavor contrast.
- Ensure butter is very cold for a flakier crust.
- Chill the dough before rolling to prevent shrinking.
- Vent the top crust properly to avoid overflow.
- Cover crust edges with foil if they brown too fast.
Variations
- Almond Cherry Pie: Add 1 tsp almond extract to the filling and sprinkle sliced almonds on top.
- Spiced Cherry Pie: Add ½ tsp cinnamon and ¼ tsp nutmeg for warmth.
- Mini Cherry Pies: Make individual pies using a muffin tin or small tart pans.
- Mixed Berry Pie: Replace half the cherries with blueberries or raspberries for a mixed berry flavor.
- Gluten-Free Version: Use gluten-free flour blend for the crust.
Freezing and Storage
- Freezing: Assemble pie but do not bake, wrap tightly, and freeze up to 2 months. Bake directly from frozen, adding 10–15 minutes to baking time.
- Storage: Store baked pie in the refrigerator for up to 4 days. Serve slightly warmed for best taste.
Conclusion
This cherry pie with double crust is a timeless dessert that delivers on both flavor and presentation. The sweet-tart filling perfectly complements the buttery, flaky crust, creating a pie that is as beautiful as it is delicious. Whether you serve it at a family gathering, holiday dinner, or a cozy night at home, it’s sure to impress and satisfy. With tips, variations, and storage advice, this recipe is versatile and reliable, making it a staple in any dessert repertoire. Baking this pie is a rewarding experience, and the first bite will instantly tell you why it’s a classic worth mastering.

Cherry Pie with Double Crust
Description
Cherry pie with a double crust is the ultimate classic dessert that embodies the taste of homemade goodness. The vibrant, tart-sweet cherry filling paired with a golden, flaky double crust creates a pie that’s both comforting and elegant. This recipe is perfect for holidays, family gatherings, or whenever you crave a slice of nostalgia.
Ingredients
For the Pie Crust (Double Crust)
For the Cherry Filling
For Assembling
Instructions
-
Make the pie crust and chill it.
-
Cook the cherry filling until thickened.
-
Roll out the bottom crust and line your pie dish.
-
Pour the cooled cherry filling into the crust.
-
Roll out the top crust and cover the pie, creating either a solid or lattice top.
-
Trim and crimp the edges, then brush with egg wash.
-
Bake first at high temperature, then reduce for even browning.
-
Let pie cool completely before slicing.
great recipe