Introduction
Cheesecake is already a beloved dessert, but when you combine it with the vibrant charm of red velvet cake and the irresistible crunch of an Oreo crust, you get a treat that’s both elegant and indulgent. Mini Red Velvet Cheesecakes with Oreo Crust are the perfect bite-sized desserts for Valentine’s Day, anniversaries, birthdays, or any time you want to impress.
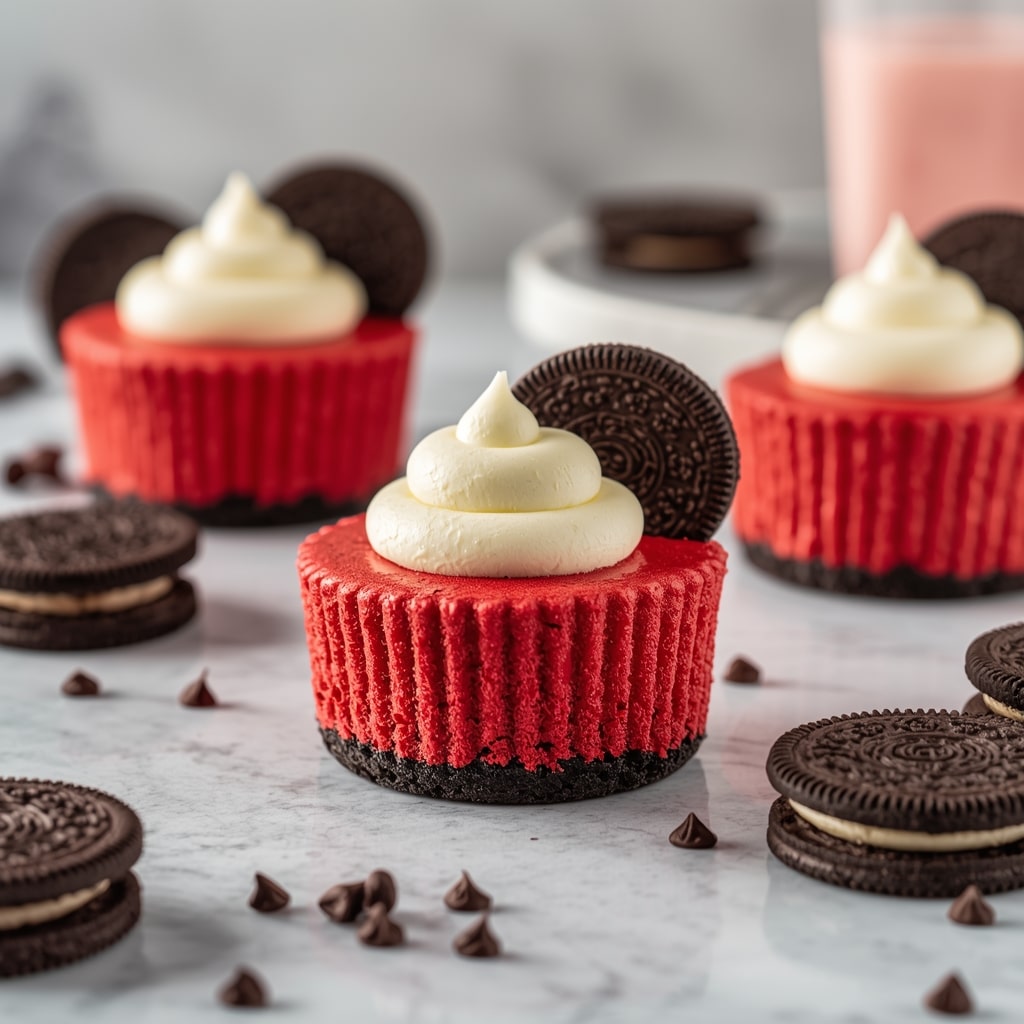
These cheesecakes balance the velvety tang of cream cheese with the rich cocoa undertones of red velvet. The Oreo crust adds a delightful crunch, while the mini size makes them fun to eat and easy to serve. Unlike full cheesecakes, these minis bake faster, cool quicker, and don’t require a water bath—making them perfect even for beginners.
Why I Love This Recipe
I love this recipe because it’s both elegant and approachable. Red velvet is always a show-stopper, but combined with cheesecake and Oreo crust, it becomes an unforgettable dessert. I also love the mini portioning—it feels indulgent without being overwhelming, and it’s perfect for sharing at parties.
Another reason I adore this recipe is its flexibility. You can dress it up with fancy garnishes for a formal event or keep it simple with just whipped cream for casual gatherings. Each mini cheesecake feels like a little gift wrapped in flavor.
Why It’s a Must-Try Dish
- Combines two classics: red velvet + cheesecake.
- Bite-sized, easy to serve, and portion-controlled.
- Faster and easier than a full cheesecake.
- Gorgeous presentation with minimal effort.
Preparation & Cooking Time
- Preparation Time: 20 minutes
- Baking Time: 18–22 minutes
- Cooling + Chilling Time: 2–3 hours
- Total Time: ~3 hours 30 minutes
Servings & Nutritional Info
- Servings: 12 mini cheesecakes
- Calories (per serving): ~280 kcal
Cuisine & Course
- Cuisine: American
- Course: Dessert
Ingredients
For the Oreo Crust:
- 18 Oreo cookies (with filling removed, if preferred)
- 4 tbsp unsalted butter, melted
For the Red Velvet Cheesecake Filling:
- 16 oz (450g) cream cheese, softened
- ½ cup granulated sugar
- 2 tbsp cocoa powder (unsweetened)
- 2 large eggs, room temperature
- ½ cup sour cream
- 1 tsp vanilla extract
- 1 tbsp red food coloring (liquid or gel)
For Topping (optional but recommended):
- Whipped cream
- Chocolate shavings or drizzle
- Red sprinkles or mini heart candies
Simple Cooking Directions
- Prepare Oreo crust and press into muffin liners.
- Beat cream cheese, sugar, cocoa, and eggs until smooth.
- Mix in sour cream, vanilla, and food coloring.
- Pour batter over crusts and bake.
- Cool completely, then chill before serving.
- Garnish with whipped cream and sprinkles.
Step-by-Step Recipe Preparation Method
Step 1: Prepare the Crust
- Preheat oven to 325°F (163°C).
- Line a 12-cup muffin pan with paper cupcake liners.
- Crush Oreos into fine crumbs using a food processor (or place in a bag and crush with a rolling pin).
- Mix crumbs with melted butter until combined.
- Divide evenly into muffin liners, pressing firmly to create a base.
Step 2: Make the Cheesecake Filling
- In a large bowl, beat softened cream cheese until smooth.
- Add sugar and cocoa powder, mixing until creamy.
- Beat in eggs one at a time, mixing well after each addition.
- Stir in sour cream, vanilla, and red food coloring until fully incorporated.
Step 3: Bake the Cheesecakes
- Spoon the batter evenly over the prepared crusts.
- Bake for 18–22 minutes, or until centers are just set. (They may jiggle slightly but will firm up as they cool.)
Step 4: Cool and Chill
- Allow cheesecakes to cool in the pan for about 30 minutes.
- Transfer to the refrigerator and chill for at least 2 hours before serving.
Step 5: Garnish and Serve
- Top with whipped cream, chocolate drizzle, or sprinkles.
- Serve chilled for best flavor and texture.
How to Serve
- Serve these cheesecakes chilled on a dessert platter.
- Pair with coffee, hot chocolate, or a glass of dessert wine.
- Perfect for Valentine’s Day, birthdays, or as a sweet ending to a romantic dinner.
Additional Recipe Tips
- Use gel food coloring for a vibrant red without affecting texture.
- Don’t overbake—slight jiggle in the center means perfect creaminess.
- Always cool before chilling; rushing can cause cracks.
- Line muffin tins with paper liners to make removal easy.
Variations
- Chocolate Swirl: Add a swirl of melted chocolate before baking.
- Cream Cheese Frosting Topping: Spread a thin layer on top instead of whipped cream.
- Cookies & Cream Twist: Keep the Oreo filling in for a sweeter crust.
- Mini Heart-Shaped Cheesecakes: Use a heart-shaped silicone mold for extra charm.
Freezing & Storage
- Refrigerator: Store in an airtight container for up to 5 days.
- Freezer: Wrap each cheesecake individually in plastic wrap and foil. Freeze for up to 2 months. Thaw overnight in the fridge before serving.
Special Equipment Needed
- Muffin pan (12-cup)
- Cupcake liners
- Electric mixer (hand or stand)
- Mixing bowls
- Food processor or rolling pin (for crushing Oreos)
Conclusion
Mini Red Velvet Cheesecakes with Oreo Crust are rich, creamy, and absolutely stunning. They combine the bold beauty of red velvet with the indulgence of cheesecake and the crunch of Oreo. Whether you’re making them for Valentine’s Day, a holiday party, or just to treat yourself, they’re guaranteed to impress. Easy to make, easy to serve, and irresistibly delicious—this recipe is a true keeper.

Mini Red Velvet Cheesecakes with Oreo Crust
Description
Cheesecake is already a beloved dessert, but when you combine it with the vibrant charm of red velvet cake and the irresistible crunch of an Oreo crust, you get a treat that’s both elegant and indulgent.
Ingredients
For the Oreo Crust:
For the Red Velvet Cheesecake Filling:
For Topping (optional but recommended):
Instructions
-
Step 1: Prepare the Crust : Preheat oven to 325°F (163°C). Line a 12-cup muffin pan with paper cupcake liners. Crush Oreos into fine crumbs using a food processor (or place in a bag and crush with a rolling pin). Mix crumbs with melted butter until combined. Divide evenly into muffin liners, pressing firmly to create a base.
-
Step 2: Make the Cheesecake Filling : In a large bowl, beat softened cream cheese until smooth. Add sugar and cocoa powder, mixing until creamy. Beat in eggs one at a time, mixing well after each addition. Stir in sour cream, vanilla, and red food coloring until fully incorporated.
-
Step 3: Bake the Cheesecakes : Spoon the batter evenly over the prepared crusts. Bake for 18–22 minutes, or until centers are just set. (They may jiggle slightly but will firm up as they cool.)
-
Step 4: Cool and Chill : Allow cheesecakes to cool in the pan for about 30 minutes. Transfer to the refrigerator and chill for at least 2 hours before serving.
-
Step 5: Garnish and Serve : Top with whipped cream, chocolate drizzle, or sprinkles. Serve chilled for best flavor and texture.