Introduction
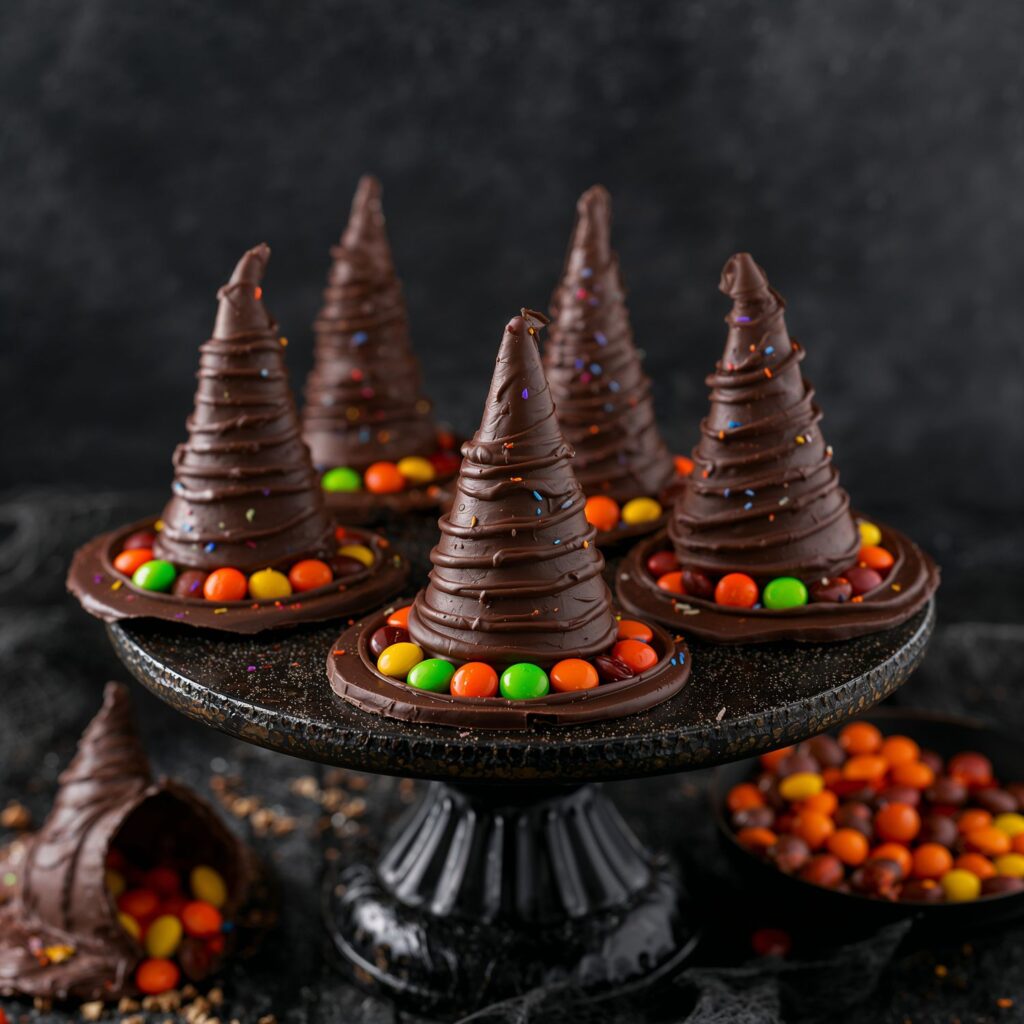
Halloween is the perfect excuse to turn simple sweets into magical creations. These Witch Hat Chocolate Cones Filled with Candy are a creative no-bake treat made with chocolate-dipped ice cream cones, cookies as hat brims, and filled with your favorite candies inside. They look spooky, whimsical, and instantly recognizable as witch hats—making them a centerpiece-worthy party snack.
They’re also interactive and customizable—kids love decorating their hats with sprinkles, candy stars, or icing details. This treat adds a mix of fun, indulgence, and creativity to your Halloween spread.
Why I Love This Recipe
I love this recipe because it’s playful, hands-on, and versatile. You don’t need to be a baker to make these hats look amazing. They require minimal effort yet deliver maximum effect for any Halloween gathering.
The best part? The cones aren’t just decorations—they’re filled with hidden candy surprises. Guests will love cracking open their witch hat to discover chocolates, gummies, or candy corn inside.
Why It’s a Must-Try Dish
- Easy & No-Bake: Minimal cooking, kid-friendly project.
- Surprise Element: Hidden candies inside make it exciting.
- Customizable: Endless ways to decorate the hats.
- Party Showstopper: Doubles as a centerpiece and a snack.
- Fun for All Ages: Kids and adults both love them.
Recipe Overview
- Preparation Time: 20 minutes
- Chilling Time (for chocolate to set): 15 minutes
- Total Time: 35 minutes
- Servings: 8 hats
- Calories per Serving: ~230–280 kcal (depends on candy used)
Cuisine & Course
- Cuisine: American (Halloween Treat)
- Course: Dessert / Party Snack
Ingredients
- 8 sugar ice cream cones
- 8 round chocolate cookies (Oreo Thins or similar, for hat brims)
- 1 ½ cups semisweet chocolate chips (or melting chocolate)
- 2 tsp coconut oil or shortening (to smooth chocolate)
- 1 cup assorted mini candies (M&Ms, candy corn, Skittles, gummies)
- Sprinkles, colored sugar, or edible glitter (for decoration)
- Colored icing or candy melts (orange, purple, green for detail)
Simple Cooking Directions
- Melt chocolate and dip cones.
- Fill cones with candies.
- Attach cookie base with melted chocolate.
- Decorate with sprinkles or icing.
- Let chocolate set before serving.
Step-by-Step Preparation Method
Step 1: Melt Chocolate
- In a microwave-safe bowl, melt chocolate chips with coconut oil in 30-second intervals until smooth.
Step 2: Dip the Cones
- Dip each sugar cone into the melted chocolate, coating fully.
- Place on parchment paper and let set slightly.
Step 3: Fill with Candy
- Once the chocolate coating is tacky but not dripping, fill each cone with assorted candies of choice.
Step 4: Seal with Cookie Brim
- Spread a thin layer of melted chocolate around the rim of the cone.
- Press a chocolate cookie against the opening, creating the witch hat brim.
Step 5: Decorate
- Use sprinkles, edible glitter, or colored icing to add details like hatbands, stars, or spooky patterns.
Step 6: Set and Serve
- Refrigerate for 10–15 minutes to harden the chocolate.
- Serve at room temperature.
How to Serve
- Arrange witch hats upright on a platter with candy corn scattered around.
- Place them at each guest’s place setting for a party favor.
- Serve as a centerpiece with a mix of decorated designs for variety.
Additional Recipe Tips
- Use parchment or wax paper to prevent sticking while drying.
- Don’t overfill cones with heavy candy; lighter candies work best.
- For a cleaner brim seal, gently twist the cookie as you press it against the cone.
- Add a ribbon of colored icing around the cone base to resemble a witch’s hatband.
Variations
- Glow-in-the-Dark Hats: Use neon candy melts and serve under a blacklight.
- Savory Version: Fill cones with popcorn or cheese crackers.
- Deluxe Candy Hats: Use mini peanut butter cups or chocolate truffles as fillers.
- Vegan Version: Use dairy-free chocolate and vegan cookies/candies.
Freezing & Storage
- Storage: Store in an airtight container at room temperature for up to 3 days.
- Refrigeration: If warm, store in the fridge up to 5 days (bring to room temperature before serving).
- Freezing: Not recommended—chocolate coating may crack.
Special Equipment Needed
- Microwave-safe bowl or double boiler (for melting chocolate)
- Parchment paper or wax paper
- Small piping bag or zip-top bag (for icing decorations)
Conclusion
These Witch Hat Chocolate Cones Filled with Candy are a spooky, whimsical, and delicious addition to any Halloween celebration. They’re fun to make, beautiful to display, and bring an element of surprise with hidden candy inside. Perfect as a party treat, favor, or edible centerpiece, they’re guaranteed to put a little magic into your Halloween festivities.

Witch Hat Chocolate Cones Filled with Candy
Description
Halloween is the perfect excuse to turn simple sweets into magical creations. These Witch Hat Chocolate Cones Filled with Candy are a creative no-bake treat made with chocolate-dipped ice cream cones, cookies as hat brims, and filled with your favorite candies inside. They look spooky, whimsical, and instantly recognizable as witch hats—making them a centerpiece-worthy party snack.
Ingredients
Instructions
-
Step 1: Melt Chocolate : In a microwave-safe bowl, melt chocolate chips with coconut oil in 30-second intervals until smooth.
-
Step 2: Dip the Cones : Dip each sugar cone into the melted chocolate, coating fully. Place on parchment paper and let set slightly.
-
Step 3: Fill with Candy : Once the chocolate coating is tacky but not dripping, fill each cone with assorted candies of choice.
-
Step 4: Seal with Cookie Brim : Spread a thin layer of melted chocolate around the rim of the cone. Press a chocolate cookie against the opening, creating the witch hat brim.
-
Step 5: Decorate : Use sprinkles, edible glitter, or colored icing to add details like hatbands, stars, or spooky patterns.
-
Step 6: Set and Serve : Refrigerate for 10–15 minutes to harden the chocolate. Serve at room temperature.